Purpose of the custom clusters
As the Lifetime Analytics application detects automatically churn, cross-sell and up-sell clusters, it allows to create or customize (edit a detected cluster) for custom analysis and marketing actions, like new promotions, new marketing product, legacy customer roll outs or comparing with external clusters.
The custom clusters are used exactly as the generated clusters (See Deep dive into cluster details for more details) with the same features.
Creating and customizing custom clusters

To customize an existing cluster, press the More icon > Edit, it opens the custom cluster editor.
To add a new custom cluster, press the Add buton onto the top panel, it opens the custom cluster editor.
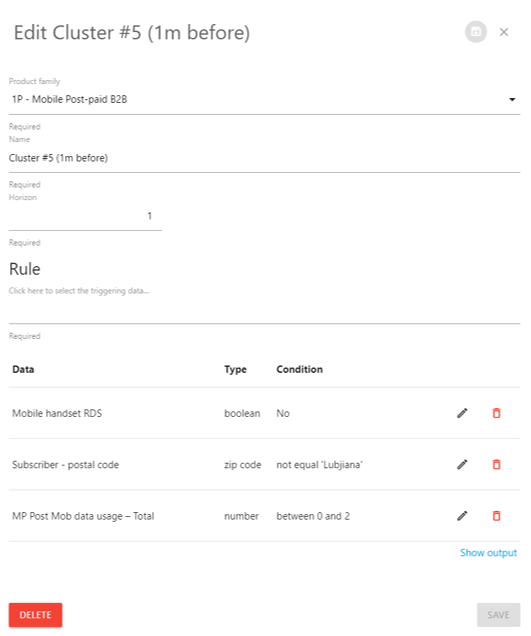
The editor allows to define :
Product family : the related product family on which the cluster applies on
Name : the name of the cluster
Horizon : the number of months anticipating the targeted event, between 1 and 12. Eg Horizon equal 2 months, it displays the subscription data two months before the snapshot date to analyze what happen in front of the churn or up selling events.
Rule : mutual conditions (logical AND) defining the cluster based upon the Data Reference (See Data Reference)
To add a condition : select the related Data Reference triggering the condition, then defines the operator and the threshold to apply. Then press the Add button to append the condition as part of the cluster's rule
To edit a condition : press the Edit button related to the condition and update the condition (data, operand and threshold)
To remove a condition : press the Delete button related to the condition
Press the Save button to apply your changes.
Press and confirm the deletion of the cluster with the Delete button.